Technical FAQs for "ImageGear.NET"

Today’s customers expect more of software applications than ever before. Piecemeal solutions that provide only a few noteworthy features are quickly being overtaken by more comprehensive platforms that deliver an end-to-end experience for users. This has prompted developers to incorporate more capabilities, while also building innovative features that set their solutions apart from the competition. Thanks to third-party software integrations, they’re able to meet both demands.
What is Third-Party Software Integration?
Third-party software integrations typically come in the form of SDKs or APIs that provide applications with specialized capabilities. Rather than building complex features like optical character recognition (OCR), PDF features, or image cleanup from scratch, developers can instead incorporate the necessary features directly into their software via an SDK or use an API call to access capabilities without expanding their application’s footprint.
From a user experience standpoint, third-party software integrations allow developers to build more cohesive software solutions that provide all the essential features a customer may require. Instead of pushing them into a separate application to interact with documents, provide a signature, or fill out a digital form, they can instead deliver an unbroken experience that’s easier to navigate and manage from start to finish.
4 Key Third-Party Software Benefits
There are a number of important benefits organizations can gain from using third-party software integrations, but four stand out in particular:
1. Reduce Development Costs
When evaluating whether it makes sense to build functionality for an application in-house or buy a third-party software integration, cost is frequently one of the key considerations. There is often a tendency to think that it would be more cost-effective to have developers already working on the project simply build the capabilities they need on their own. After all, there’s no shortage of open-source SDKs and other tools that are available without having to pay licensing or product fees.
In practice, however, this approach usually ends up being more expensive in the long run. That’s because the developers working on the project often lack the experience needed to build those capabilities quickly. A software engineer hired to help build AI software, for instance, probably doesn’t know a lot about file conversion or annotation. While they might be able to find an open-source tool to build those features, they still need to do quite a bit of development work and on-the-job learning to get the new capabilities stood up and thoroughly tested.
Focusing on these features means they’re not focusing on the more innovative aspects of their application. From a cost standpoint, that means they’re being paid to build something that’s already readily available in the market. When these internal development costs are taken into account, it’s almost always more cost effective to buy ready-to-implement software features built by an experienced third party. As the saying goes, there’s no reason to reinvent the wheel.
2. Get to Market Faster
Software developers are always working against the clock. With new applications hitting the market faster than ever, there’s tremendous pressure to keep development timelines on track and avoid missing important deadlines. This helps projects stay within their expected budgets and prevents potential competitors from getting to market faster. Any steps that can be taken to accelerate development and potentially shorten the timeline to releasing a product could mean the difference between becoming an industry innovator or being labeled as an also-ran.
Third-party software integrations allow developers to quickly and seamlessly integrate essential capabilities into applications without compromising their project timeline. Rather than building features like forms processing, document annotation, and image conversion from scratch, teams can instead use third-party SDKs and APIs to add proven, reliable, and secure features in a fraction of the time. By keeping projects on or ahead of schedule, they can focus on delivering a better, more robust product that exceeds customer expectations.
3. Expand Application Features & Functionality
Software development teams typically possess the experience and expertise needed to build the core architecture and innovative features of a new application. In many cases, they’re designing something novel that will provide a point of differentiation in the market. The more time they can spend on refining and expanding those capabilities, the more likely the application is to make an impact and win over customers.
What these developers often lack, however, are the skills needed to implement a variety of other features that will enhance the application’s functionality. Features like document conversion, OCR, PDF support, digital forms, eSignature, and image compression are complex and difficult to build from scratch. By integrating third-party software, developers can leverage proven, feature-rich technology to expand their application’s capabilities. This not only allows them to improve their solution’s versatility but also enhance the overall user experience by eliminating the need for external programs or troublesome plug-ins.
4. Access Specialized Engineering Support
Incorporating features like PDF support, image conversion, and document redaction into an application poses several challenges. Some of those challenges don’t show up right away, instead, they become evident long after a software product launches. If the developers don’t have a lot of experience with the technology behind those features, minor issues can quickly escalate into serious problems that leave customers unhappy and willing to look elsewhere for alternatives. No organization wants to be caught in a situation where a bug embedded in an open-source tool renders a client’s valuable assets unusable.
By leveraging proven, tested, and secure third-party software integrations, developers gain access to support from experienced engineering teams with deep knowledge of their solutions. In addition to documentation and code samples, they can also speak directly with developers who can provide guidance on how to best integrate features and resolve issues when they emerge. The best integration providers will even work with organizations to customize their solutions to meet specific application needs, which helps create even smoother user experiences and enhances reliability.
Integrating Third-Party Software with Accusoft
For over 30 years, Accusoft has helped organizations add essential features like barcode recognition, file conversion, document assembly, and image compression to their applications through an innovative line of SDKs and APIs. Our document lifecycle technologies are backed by multiple patents and have been incorporated successfully into a wide range of applications. Our dedicated engineers provide ongoing support and work closely with customers to implement their specific use cases, ensuring that their software platform is delivering the best possible experience.
To learn more about integrating third-party software with Accusoft SDKs and APIs, talk to one of our solutions experts today.

These days there is a heightened awareness of the risk of opportunity for a data breach or cyber attack. Whether the spike in attention came from a global pandemic, brink of international war, or an unknown hacker that set its sights on Elon Musk, there is a general consensus that our personal data is at risk at any point through a breach of security. This becomes more potent for companies as the cost of such insecurity could potentially end its tenure. According to an IBM Data Breach Report, 2021 had the highest average data breach cost in a 17-year history of $4.24M. Securing data and maintaining an individual’s privacy is a priority for many organizations throughout the world, but following a strict standard has only been attempted by the European Union (EU) thus far.
The EU has taken this priority a step further than just suggesting companies and organizations increase data protection – since 2018, they’ve mandated and enforced specific requirements through the General Data Protection Regulation (GDPR). Given the broad parameters covered under GDPR compliance, ensuring the standards are met can become a time-consuming, stressful and ongoing issue if not resourced properly. The parameters go beyond the protection of personal data and go as far as requirements, to prove security measures are set in place.
Who Needs to Maintain GDPR Compliance?
While often only associated within the European Union, the requirements and legislation of the GDPR extend as far as all “entities who are offering goods or services to anyone residing in the EU (even if those services are provided free of cost). Any global business either has to become compliant for all of its users/customers or be able to accurately identify EU residents and enable compliant systems to handle only that subset of the customer base.”
GDPR requires companies to know the following as related to personal data:
- What personal data is being shared
- Where it is being shared
- How it can be deleted at a moment’s notice if necessary
The GDPR also highly encourages that an organization designates an employee to be the point of contact and in control of the data security processes and systems to maintain compliance. A first step to having an effective process in place is choosing the right tools with security features to protect data being shared within the company.
Managing Risk through Secure Document Viewing
As risk management becomes an essential part of strategic planning, the importance of IT security and data encryption skyrockets to the top of priorities for most companies. GDPR suggests encryption as a means to manage risk in file sharing but does not outline explicit instruction. With PrizmDoc™ Viewer, companies gain added data security, aligned with GDPR compliance, in document viewing and sharing without heavy client-side installations or downloads.
PrizmDoc™ Viewer is created with Multi-Level Data Protection including:
- 256-bit AES encryption
- (Advanced Encryption Standard) is an international standard that ensures data is encrypted/decrypted following this approved standard. It ensures high security and is adopted by the U.S. government and other intelligence organizations across the world.
- Configurable user permissions add a strong measure of privacy and protection to document content.
A Simple Path to Secure Document Sharing
Remote work or not – collaborating on a project today means sharing documents among many colleagues to finalize a document, project, or presentation. To do that with security in mind, organizations are cobbling together tech stacks to meet their productivity needs along the way, and several different file types can come across their desks in a single day.
PrizmDoc™ Viewer integrates into your current application to render and display a multitude of file types with high fidelity and speed. The ease of use features include:
- Flexible use across many platforms
- A self-hosted version that resides on any organization’s servers
- Empowers developers to provide their users with responsive file viewing
- Search and redaction can be easily turned on/off
PrizmDoc Viewer is also designed to run on all devices with a zero-footprint viewer that makes it easy for employees to work where and how they wish. The white label services give an organization the flexibility to brand and customize while gaining peace of mind in data security.
Open and View an Image Securely the First Time
While documents have a range of formats from Word, PDF, spreadsheets, and more – images are often more of a culprit when it comes to difficulty viewing, let alone being able to download, edit, markup, or save information as a separate file. Workers find themselves quickly downloading a media player just to open the image. Having multiple solutions in place is not only confusing, but it also contributes to inefficiency and human error which means added risk for images to remain secure.
As photographs can constitute personal data under the GDPR, this means organizations must be able to quickly and easily remove all images where the individual can be identified.
With ImageGear, an organization is able to add powerful image processing capabilities that enhance secure collaboration such as:
- PDF manipulation that includes managing access with digital signatures for added security levels
- The image processing library offers developers a set of methods for modifying an image including to resize, crop, merge, rotate, and flip.
- An option to add OCR for document search and data capture support
Getting Started
To quickly gain peace of mind with secure collaboration, contact us today.
Accusoft’s ImageGear is a powerful image processing SDK integration that allows software developers to give their applications the ability to open, convert, and transform multiple image file formats. Given the complexity of image processing tasks, turning to a comprehensive SDK can save significant time and headaches in the software development cycle. Rather than building image manipulation features from scratch or seeking out multiple open source solutions for every processing need, developers can use ImageGear to add image processing essentials and whatever capabilities they need to keep their project on schedule.
8 Essential ImageGear Features
ImageGear delivers several noteworthy capabilities that are worth highlighting for developers looking to add image processing features to their applications. Here are a few of the most essential:
1. General Use Tools
Although ImageGear delivers a wide range of advanced image processing capabilities, it also provides a variety of conventional tools for image modification. Developers often incorporate these features into their application’s viewing interface, which allows users to easily alter images as needed. Some of the more commonly used tools include:
- Image cropping
- Image rotation and resizing
- Thumbnail creation
- Sharpening/smoothing filters
- Contrast adjustment/gamma correction
- Red eye removal
2. Region of Interest Selection
Using ImageGear’s region of interest (ROI) features, it’s possible to create a freely shaped image area that can be targeted for additional processing. The ROI can be an ellipse or polygon shape, or it can be drawn freehand. Marking a specified area creates a 1-bit mask image to indicate which pixels will be affected by image processing algorithms.
3. Erosion/Dilation
ImageGear deploys mathematical morphology operations to help clean up and enhance binary images. Erosion works by removing layers of pixels from the inner and outer boundaries of defined regions in the foreground. This causes the white pixels in the foreground to shrink, which has the effect of making the area darker. Dilation performs the opposite function, increasing the boundaries of those same pixels to make the image region lighter. These functions are typically deployed in combination to remove objects or smooth borders on black and white or grayscale images.
4. Edge Detection
A key image processing capability, edge detection is used in pattern recognition, image matching, and 3D vision applications to identify the boundaries of objects within images. This function is particularly useful for image segmentation and data extraction tasks.
5. Speckle Removal
Speckling is the distinctive “salt and pepper” noise commonly found in many scanned or low resolution images. ImageGear has two different ways of removing speckles from an image to reduce noise and improve the overall quality without blurring details.
- Despeckle Method: Removes color noise from a 1-bit image by finding the average color value within the ROI and replacing the other pixels in the speckle area with this value.
- GeomDespeckle Method: Uses the Crimmins complementary hulling algorithm, which sends the image through a geometric filter that reduces speckle noise without compromising the edges of the original image.
6. ImageClean
The ImageClean function is a multi-faceted cleanup tool that uses several classes to perform common image processing tasks. Some of those tasks include:
- Inverting white text or auto-inverting black text on a white background.
- Auto-orientation or auto-cropping of an image.
- Cleaning borders.
- Dotted or solid line removal.
- Punch hold removal.
7. Background Correction
ImageGear can identify the best-fit plane for an image and then adjust the image luminance tilt accordingly, either by increasing or decreasing the image plane. This method is particularly effective at correcting illumination gradients in low-quality digitized images.
8. Image Effects
As part of its image processing capabilities, ImageGear provides a wide array of image effects that can be used to transform or modify image files. Developers can easily integrate these tools into their application’s viewer to allow end users to easily alter images. Some of these image effects include:
- Aging Effect: This effect adjusts image saturation and contrast to make an image appear worn and old. Noise and random vertical lines are also added to enhance the effect.
- Boost Effect: Often used to make older or faded images look new and more vibrant, this effect increases saturation, brightness, and contrast.
- Drop Shadow: This method adds a drop shadow to an image, which is often useful for setting an image apart from a background when combining visual elements.
- Gaussian Blur: Typically used to smooth out composited images, this effect blurs pixels to soften images and make them appear slightly (or extremely) out of focus.
- High Density Range Effect: This effect increases the contrast of shadow, highlight, and midtone areas separately, which mimics the human eye’s ability to adjust to lighting conditions rather than applying a uniform contrast adjustment.
- Lens Flare Effect: Commonly used to make images appear more dramatic or realistic, this method simulates a bright light reflecting within the camera lens.
- Solarize Effect: This effect sets a light threshold and then inverts the colors of any pixels that exceed that value. When applied to an image, it mimics the look of photographic film that was exposed to too much light during development.
- Toy Camera Effect: Often used to liven up an image, this effect emulates the distortions and imperfections created by using a low-quality camera lens in poor shooting conditions.
- Sketch Effect: By blending the original image with a texture image, this effect can make the image look like it was sketched with a pencil or charcoal.
- Artistic Effects: This feature includes a series of effects that make images look as if they were hand painted. Two of these methods, the Pointillist and Splatter methods, use randomly generated pixel elements that cause the resulting image to be different each time the method is applied.
Expand Your Image Processing Capabilities with ImageGear
The features listed above only scratch the surface of ImageGear’s capabilities. In addition to essential image processing tools, the SDK also allows developers to add document features like annotation, conversion, compression, and full-page optical character recognition (OCR). With support for dozens of file formats, ImageGear gives software teams the tools they need to expand their application’s capabilities without wasting months of valuable development time. To get a first-hand look at what ImageGear can do for your .NET application, download a trial today.

Periods of great disruption often have a way of presenting opportunities to companies willing to make the right investments in the future. That’s been especially true of the COVID-19 pandemic, which demonstrated that many organizations are, in fact, capable of implementing rapid and sweeping technology changes when they prioritize such initiatives. A survey of executives by McKinsey found that companies implemented significant digital transformations 20 to 25 times faster than expected, largely due to urgency and the removal of longstanding roadblocks.
By undertaking major technology upgrades now, businesses can position themselves for future success before a new status quo settles in to stifle change. Companies would do well to focus their attention on a few potential areas where their applications could support digital transformation efforts with just a bit of customization.
The Great Remote Migration
The COVID-19 pandemic forced many organizations to rapidly implement the policies and technology necessary to support a remote working environment. Even though the vaccine rollout has made it possible for people to return to the physical office, not every company is rushing to bring everyone back. According to a survey of enterprise CEOs, 68 percent of large organizations are planning to downsize their office footprint and keep at least some portion of their workforce remote.
Although it no longer seems likely that remote work arrangements will completely replace traditional in-person offices, it does appear that the hybrid workforce is gaining popularity as the new normal for organizations. These workplaces will maintain a physical office presence while also incorporating a large number of remote employees. In some cases, these remote workers will be geographically distributed and never set foot in the office. This will allow companies to tap into broader talent pools from around the world. In other cases, employees will be given the option to work remotely under certain conditions, allowing them to decide when they have to actually travel to the office.
Both arrangements will present a number of challenges from a technology and a policy standpoint. In order to create a successful hybrid workplace, companies must continue to make investments in the digital document management technologies that make remote work possible. In addition to managing the myriad security challenges posed by remote employees, they also need to rethink how to handle documents now that passing paper for processing is not as simple as walking that paper document down the hall. Developers can support the transition by focusing their efforts on building robust applications that can be accessed anywhere and can handle the viewing and processing of digitized documents.
Shifting Customer Expectations
Another major change coming out of the pandemic is the extent to which customers now expect brands to offer a better digital experience with their services. Not only do people use more digital services, but their expectations about how those services should respond to their needs also underwent a significant change. They expect services to be faster and less complicated, and their tolerance for experiences that fall short of those expectations will be lower than ever in the years to come.
Organizations that fail to invest in technology and applications that allow them to better address customer demands will find themselves falling behind in an increasingly competitive landscape. That creates tremendous opportunities for developers to build and market software that does a better job of creating a seamless link between companies and their end-users. That will include user experience features like better document viewing, more accurate data capture, and improved automation tools.
Developers are also under pressure to design innovative applications that can transform business processes and help companies get an edge over their competitors. Sophisticated features powered by machine learning and big data can provide valuable business intelligence and automate low-value tasks to boost productivity. To focus on those capabilities, developers will increasingly rely on third-party SDK and API solutions to deliver core functionality like viewing, conversion, annotation, and compression. By relying on proven, ready-made solutions, they can dedicate more time and resources to innovation.
Rethinking Document Lifecycle Technology
Even before the pandemic, organizations were trying to consolidate and simplify their technology infrastructure to eliminate unnecessary sprawl and software redundancies. Often referred to as application rationalization, this trend will undoubtedly continue as companies look to maximize efficiency to reduce costs while enhancing productivity. One business process that will certainly get a closer look is document lifecycle management.
Traditionally, companies have relied upon multiple software tools to handle the operations associated with each step of the document lifecycle. Common tasks like document scanning, form identification, data extraction, file conversion, viewing, and annotation could all be performed by distinct applications, forcing employees to constantly switch between programs and copy or move files in order to work with them. This process is not only grossly inefficient but also greatly increases the risk of human error or version confusion.
Thanks to a new generation of SDK and API tools, developers can easily add new features to their software products that help to streamline and consolidate key elements of digital document lifecycles. From HTML5 viewing capabilities that make it easier to convert and open files within a web browser to more sophisticated data capture and document assembly tools that make true automation possible, these easy-to-implement integrations allow applications to carry out more essential workflow tasks without having to rely on external support.
Upgrading Your Application’s Potential with Accusoft
As organizations seize the opportunity to make essential technology upgrades, developers must be ready to provide them with the innovative applications capable of replacing legacy systems and keeping pace with customer expectations. Building software with the extensive functionality that companies require will continue to be a challenge for software teams facing budget and resource limitations. By turning to a partner with the right software integrations, they can quickly implement a wide spectrum of powerful features while keeping their own development efforts focused on designing best-in-class capabilities and bringing them to market quickly.
Accusoft’s collection of SDK and API solutions allows you to build a variety of powerful processing tools into your applications. Whether you need the conversion, viewing, and annotation features of PrizmDoc Viewer, the robust back-end processing capabilities of ImageGear, or the automated forms processing tools of the FormSuite Collection, our family of software integrations can help your application meet the varied needs of today’s companies. Learn more about our SDK and API solutions and explore how they can make your current project even more impressive.
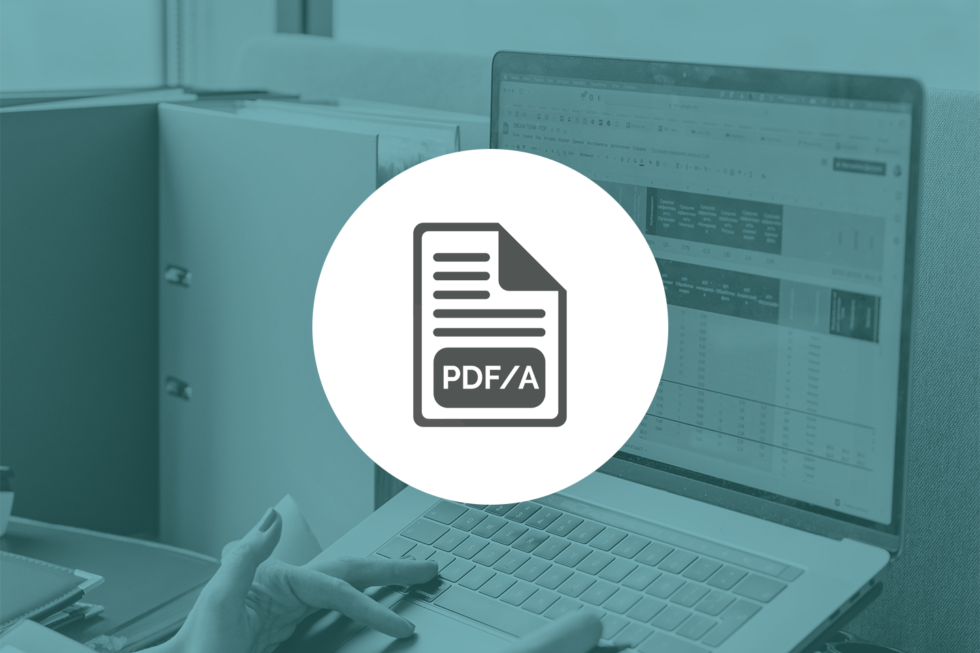
The industry-wide push to digitize documents and minimize the use of physical paperwork has made PDF one of the most ubiquitous file formats in use today. Business and government organizations use PDFs for a variety of document needs because they can be viewed by so many different applications. When it comes to archiving information, however, PDFs have a few limitations that make them unsuitable for long-term storage. That’s why many organizations require such files to be converted into the more specialized PDF/A format. Learn how easy it is to convert PDF to PDF/A with ImageGear.
What Is PDF/A?
Originally developed for archival purposes, the PDF/A format is utilized for long-term preservation that ensures future readability. It has become the standard format for the archiving of digital documents and files under the ISO 19005-1:2005 specification. Government organizations are increasingly utilizing PDF/A to digitize existing archival material as well as new documents.
The distinctive feature of PDF/A format is its universality. Although PDFs are well entrenched as the de facto standard for digital documents, there are many different ways of assembling a PDF. This results in different viewing experiences and sometimes makes it impossible for certain PDF readers to even open or render a file. Because PDF/A documents need to be accessible in the indeterminate future, there are strict requirements in place to ensure that they will always be readable.
PDF vs PDF/A
While PDF and PDF/A are based upon the same underlying framework, the key difference has to do with the information used to render the document. A standard PDF has many different elements that make up its intended visual appearance. This includes text, images, and other embedded elements. Depending upon the application and method used to create the file, the information needed to render those elements may be more or less accessible for a viewing application.
When a PDF viewer cannot access the necessary data to render elements correctly, the document may not display correctly. Common problems include switched fonts (because the original font information isn’t available), missing images, and misplaced layers.
A PDF/A file is designed to avoid this problem by including everything necessary to display the document accurately. Fonts and images are embedded into the file so that they will be available to any viewer on any device. In effect, a PDF/A doesn’t rely on any external dependencies and leaves nothing to chance when it comes to rendering. The document will look exactly the same no matter what computer or viewing application is used to open it. This level of accuracy and authenticity are important when it comes to archival storage, which is why more organizations are turning to PDF/A when it comes to long-term file preservation.
How to Convert PDF to PDF/A
ImageGear supports a broad range of PDF functionality, which includes converting PDF format to a compliant PDF/A format. It can also evaluate the contents of a PDF file to verify whether or not it was created in compliance with the established standards for PDF/A format. This is an important feature because it will impact what method is used to ultimately convert a PDF file into a PDF/A file.
Verifying PDF/A Compliance
By analyzing the PDF preflight profile, ImageGear can detect elements of the file to produce a verifier report. The report is generated using the ImGearPDFPreflight.VerifyCompliance method.
It’s important to remember that this feature does NOT change the PDF document itself. The report also will not verify annotations that have not been applied to the final document itself. Once the report is generated, a status code will be provided for each incompliant element flagged during the analysis.
These codes can have two values:
- Fixable: Indicates an incompliance that can be fixed automatically during the PDF/A conversion process.
- Unfixable: Indicates a more substantial incompliance that will need to be addressed manually before the document is converted into PDF/A.
Converting PDF to PDF/A
After running the verification, it’s time to actually convert the PDF to PDF/A. The ImGearPDFPreflight.Convert method will automatically perform the conversion provided there are no unfixable incompliances. This process will change the PDF document into a PDF/A file and automatically address any incompliances flagged as “Fixable” during the verification process.
While it is not necessary to verify a PDF before attempting conversion, doing so is highly recommended. Otherwise, the document will fail to convert and return an INCOMPLIANT_DOCUMENT code. The output report’s Records property will provide a detailed report of incompliant elements. Since any “Fixable” incompliances would have been addressed during conversion, the document’s remaining issues will need to be handled manually.
This method is best used when manual changes need to be made to the PDF file prior to conversion. One of the most common changes, for example, is making the PDF searchable. Once the alterations are complete, the new file can be saved using the ImGearPDFDocument.Save method.
Other ImageGear PDF to PDF/A Conversion Methods
Raster to PDF/A
ImageGear can save any PDF file produced directly by a raster file as a PDF/A during the initial conversion. A series of automatic fixes are performed during this process to ensure compliance.
- Uncalibrated color spaces are replaced with either a RGB or CMYK color profile. This could change the file size.
- Any LZW and JPEG2000 streams are recompressed since PDF/A standards prohibit LZW and JPEG 2000 compression.
- All document header and metadata values are automatically filled in to comply with PDF/A requirements.
Quick PDF to PDF/A Conversion
For quick conversions in workflows that don’t require displaying or working with a file in any way, the ImGearFileFormats.SaveDocument method is another useful option. This process loads the original file, converts it, and saves the new version all at once. It’s important to set the PreflightOptions property to be set in the save options. Otherwise, the new document will not save as a PDF/A compliant file.
Take Control of PDF/A Conversion with ImageGear
Accusoft’s versatile ImageGear SDK provides enterprise-grade document and image processing functions for .NET applications. With support for multiple file formats, ImageGear allows developers to easily convert, compress, and optimize documents for easier viewing and storage.
ImageGear takes your application’s PDF capabilities to a whole new level, delivering annotation, compliant PDF to PDF/A conversion, and other manipulation tools to meet your workflow needs. Learn more about how ImageGear can save you time and resources on development by accessing our detailed developer resources.

Portable Document Format (PDF) files have become the ubiquitous way to store documents for sharing with a broad audience. While popular, PDF documents have several drawbacks. One large drawback is the fact that PDF documents are intended to be immutable. In other words, PDF documents lack the internal information necessary to reorganize its contents, unlike, for instance, a word processor document. Here’s how to resize PDF files with ImageGear.
There are however ways to reclaim portions of PDF documents for use in new or updated PDF documents. One of the most common is to reuse pages from existing PDF documents. This does lead to one particularly vexing issue – reusing pages that were created for different media sizes.
When a PDF document has pages that are all the same size, PDF viewers can scale and scroll the document consistently, and the document appears aesthetically pleasing. The document is also likely to print well. The problem is that PDF pages from image scanners, PDF pages produced by word processors, and PDF pages generated from images are likely to be produced with different media sizes.
This is where ImageGear .NET can help. ImageGear .NET can resize PDF pages using the following code.
First, we need to determine what size we want the pages to be. We will use this size to define the “MediaBox”, which specifies the outermost boundaries of the page. For this example, we will use 8.5 inches by 11 inches, which is letter size.
ImGearPDFDocument igPDFDocument;
using (Stream stream = new FileStream(@"PDFDocumentIn.pdf", FileMode.Open, FileAccess.Read))
    igPDFDocument = (ImGearPDFDocument)ImGearFileFormats.LoadDocument(stream, 0, -1);

    double newMediaBoxWidth = 8.5 * 72.0; // Convert inches to Points
    double newMediaBoxHeight = 11 * 72.0;
Next, we iterate through the pages in the PDF document, and resize each page. To resize a page, we first need to determine how much to scale and translate the page.
foreach (ImGearPDFPage page in igPDFDocument.Pages)
{
    using (ImGearPDFBasDict pageDict = page.GetDictionary())
    {
	     // Get the existing MediaBox to determine how much to scale and translate the page
	     ImGearPDFAtom mediaBoxKey = new ImGearPDFAtom("MediaBox");
 	     ImGearPDFBasArray mediaBox = (ImGearPDFBasArray)pageDict.Get(mediaBoxKey);
	     double mediaBoxLowerLeftX = (((ImGearPDFBasInt)(mediaBox.Get(0))).Value);
	     double mediaBoxLowerLeftY = (((ImGearPDFBasInt)(mediaBox.Get(1))).Value);
	     double mediaBoxUpperRightX = (((ImGearPDFBasInt)(mediaBox.Get(2))).Value);
	     double mediaBoxUpperRightY = (((ImGearPDFBasInt)(mediaBox.Get(3))).Value);
	     // Calculate how much to scale each axis to fill the page
	     double scaleX = newMediaBoxWidth / (mediaBoxUpperRightX - mediaBoxLowerLeftX);
	     double scaleY = newMediaBoxHeight / (mediaBoxUpperRightY - mediaBoxLowerLeftY);
	     // Determine which axis needs the least scaling to fill the page
	     double scale = scaleX;
	     if(scaleY < scaleX)
	         scale = scaleY;
	     // Determine how much to shift the content to center the page
	     double translateX = mediaBoxLowerLeftX + (newMediaBoxWidth - (mediaBoxUpperRightX - mediaBoxLowerLeftX) * scale) / 2.0;
	     double translateY = mediaBoxLowerLeftY + (newMediaBoxHeight - (mediaBoxUpperRightY - mediaBoxLowerLeftY) * scale) / 2.0;
Next, create an Affine matrix to scale and translate the page.
        // Create an Affine matrix to scale and translate the page
        ImGearPDFFixedMatrix scaleMatrix = new ImGearPDFFixedMatrix
	    {
	        A = ImGearPDF.DoubleToFixed(scale),
	        D = ImGearPDF.DoubleToFixed(scale),
	        H = ImGearPDF.DoubleToFixed(translateX),
	        V = ImGearPDF.DoubleToFixed(translateY)
	    };
Using the Affine matrix, transform the contents of the page. Since we will be transforming individual elements on the page, we need to keep track of each transformed element (using transformedIDs) so we don’t transform any element more than once.
        try
        {
             // Transform all the elements on each page. Keep track of transformed elements
             // so that no element is transformed more than once.
             using (ImGearPDEContent content = page.GetContent())
             {
                  List<int> transformedIDs = new List<int>();
                  TransformContent(content, scaleMatrix, transformedIDs);
                  page.SetContent();
             }
         }
         finally
         {
             page.ReleaseContent();
         }
Now that the page has been transformed, set the new MediaBox.
         using (ImGearPDFBasArray newMediaBox = new ImGearPDFBasArray((ImGearPDFDocument)page.Document, false, 4))
         {
   	          // Update the MediaBox
              newMediaBox.PutFixed(0, false, ImGearPDF.DoubleToFixed(0.0));
              newMediaBox.PutFixed(1, false, ImGearPDF.DoubleToFixed(0.0));
              newMediaBox.PutFixed(2, false, ImGearPDF.DoubleToFixed(newMediaBoxWidth));
              newMediaBox.PutFixed(3, false, ImGearPDF.DoubleToFixed(newMediaBoxHeight));
              pageDict.Put(mediaBoxKey, newMediaBox);
   	          // Remove any existing CropBox
              ImGearPDFAtom cropBoxKey = new ImGearPDFAtom("CropBox");
              if(pageDict.Known(cropBoxKey))
                  pageDict.Remove(cropBoxKey);
          }
Now we need the function TransformContent() to transform the content of a PDF page. This will take each element on a page and individually transform it to its new location on the page.
private void TransformContent(ImGearPDEContent content, ImGearPDFFixedMatrix scaleMatrix, List<int> transformedIDs)
{
   // If there is a matrix in the content attributes, transform it.
   ImGearPDEContentAttrs contentAttributes = content.GetAttributes();
   contentAttributes.Matrix = Concat(contentAttributes.Matrix, scaleMatrix);
   // Transform each element in the content
   for (int i = content.ElementCount - 1; i >= 0; i--)
   	using (ImGearPDEElement pdeElement = content.GetElement(i))
   	     TransformElement(pdeElement, scaleMatrix, transformedIDs);
}
Now we need the function TransformElement() to transform individual elements on a PDF page. Note that some elements contain elements and even content. These elements and content will be transformed recursively (hence the need for the transformedIDs list).
private void TransformElement(ImGearPDEElement pdeElement, ImGearPDFFixedMatrix scaleMatrix, List<int> transformedIDs)
{
   if (!transformedIDs.Contains(pdeElement.UniqueId))
   {
   	transformedIDs.Add(pdeElement.UniqueId);
   	switch(pdeElement.Type)
   	{
   	    case ImGearPDEType.CONTAINER:
   		ImGearPDEContainer pdeContainer = (ImGearPDEContainer)pdeElement;
   		using (ImGearPDEContent moreContent = pdeContainer.GetContent())
   		    TransformContent(moreContent, scaleMatrix, transformedIDs);
   		break;
   	    case ImGearPDEType.CLIP:
   		 ImGearPDEClip pdeClip = (ImGearPDEClip)pdeElement;
   		 for (int i = pdeClip.ElementCount - 1; i >= 0; --i)
   		     using (ImGearPDEElement anotherElement = pdeClip.GetElement(i))
   			 TransformElement(anotherElement, scaleMatrix, transformedIDs);
   		 break;
   	    case ImGearPDEType.GROUP:
   		 ImGearPDEGroup pdeGroup = (ImGearPDEGroup)pdeElement;
   		 using (ImGearPDEContent moreContent = pdeGroup.GetContent())
   		     TransformContent(moreContent, scaleMatrix, transformedIDs);
   		  break;
   	    case ImGearPDEType.TEXT:
   		 ImGearPDEText pdeText = (ImGearPDEText)pdeElement;
   		 for (int i = 0; i < pdeText.RunsCount; ++i)
   		     pdeText.RunSetMatrix(i, Concat(pdeText.GetMatrix(ImGearPDETextFlags.RUN, i), scaleMatrix));
   		 break;
   	    case ImGearPDEType.FORM:
   		 ImGearPDEForm pdeForm = (ImGearPDEForm)pdeElement;
   		 pdeForm.SetMatrix(Concat(pdeForm.GetMatrix(), scaleMatrix));
   		 using (ImGearPDEContent moreContent = pdeForm.GetContent())
   		     TransformContent(moreContent, scaleMatrix, transformedIDs);
   		 break;
   		 default:
   		     pdeElement.SetMatrix(Concat(pdeElement.GetMatrix(), scaleMatrix));
   		     break;
   	 }
   	 if (pdeElement.Type != ImGearPDEType.CLIP)
   	    using (ImGearPDEElement pdeClip = pdeElement.GetClip())
   		if (pdeClip != null && pdeClip.Type == ImGearPDEType.CLIP)
   		    TransformElement(pdeClip, scaleMatrix, transformedIDs);
   }
}
The last part we need is a function to concatenate (multiply) two Affine matrices together.
private ImGearPDFFixedMatrix Concat(ImGearPDFFixedMatrix matrix1, ImGearPDFFixedMatrix matrix2)
{
    // Multiply two Affine transformation matrices together to produce one matrix
    // that will perform the same transformation as the two matrices performed in series
    double matrix1A = ImGearPDF.FixedToDouble(matrix1.A);
    double matrix1B = ImGearPDF.FixedToDouble(matrix1.B);
    double matrix1C = ImGearPDF.FixedToDouble(matrix1.C);
    double matrix1D = ImGearPDF.FixedToDouble(matrix1.D);
    double matrix1H = ImGearPDF.FixedToDouble(matrix1.H);
    double matrix1V = ImGearPDF.FixedToDouble(matrix1.V);
    double matrix2A = ImGearPDF.FixedToDouble(matrix2.A);
    double matrix2B = ImGearPDF.FixedToDouble(matrix2.B);
    double matrix2C = ImGearPDF.FixedToDouble(matrix2.C);
    double matrix2D = ImGearPDF.FixedToDouble(matrix2.D);
    double matrix2H = ImGearPDF.FixedToDouble(matrix2.H);
    double matrix2V = ImGearPDF.FixedToDouble(matrix2.V);
    ImGearPDFFixedMatrix result = new ImGearPDFFixedMatrix
    {
        A = ImGearPDF.DoubleToFixed(matrix1A * matrix2A + matrix1B * matrix2C),
        B = ImGearPDF.DoubleToFixed(matrix1A * matrix2B + matrix1B * matrix2D),
        C = ImGearPDF.DoubleToFixed(matrix1C * matrix2A + matrix1D * matrix2C),
        D = ImGearPDF.DoubleToFixed(matrix1C * matrix2B + matrix1D * matrix2D),
        H = ImGearPDF.DoubleToFixed(matrix1H * matrix2A + matrix1V * matrix2C + matrix2H),
        V = ImGearPDF.DoubleToFixed(matrix1H * matrix2B + matrix1V * matrix2D + matrix2V)
     };
     return result;
}
After modifying the PDF document, save it.
using (Stream stream = new FileStream(@"PDFDocumentOut.pdf", FileMode.Create, FileAccess.Write))
    igPDFDocument.Save(stream, ImGearSavingFormats.PDF, 0, 0, -1, ImGearSavingModes.OVERWRITE);
Using this code, you should be able to resize any PDF document page.
To learn more about ImageGear and all of its capabilities, check out the ImageGear .NET product page and dive into the developer resources section.
If you’re building a product that helps financial institutions with a variety of different processes, you’ll know that lenders are pressed for time. Lending institutions are struggling to keep up with the amount of credit requests in an age where customers expect instant gratification. When consumers request anything from a bank or lending organization, they expect the application process to be quick and easy. However, current financial applications can create some hurdles. Building a robust financial software application can overcome these hurdles.

Lenders are searching for ways to approve applicants in a more timely manner. However, each new request comes with a variety of different files and forms to sort through. With so much data to organize and analyze, this process is a struggle for financial institutions. They need to approve the request before the consumer starts looking at their competitors. How can your product help your clients stay up to date?
Building New Financial Solutions
Financial institutions need a product that includes data capture and processing tools, enabling them to approve loan applications more efficiently. Your product could help them begin this process. First, let’s talk about gathering files for large loans. Data comes in all shapes and sizes – including different file types. You’ll need a way to convert these files into one searchable PDF.
In addition, there are a variety of standard forms that show up in the lending process. You’ll also need a solution for forms processing to gather data. Data capture and forms processing facilitates the automation of lending, whether it’s a line of credit or loan origination.
Once various borrower documents are gathered, they can be scanned and cleaned in preparation for processing. Then you can start extracting data. To do this, you’ll need a way to identify the form fields and recognize the data within them.
Capturing Consumer Data
Lenders generally have a standard procedure in place for viewing and collaborating on borrower histories. Historically, when they view the files, such as W-2s and other IRS forms, they need to be able to find and highlight specific information from those forms that the lender needs in order to process the loan.
What if you could give them a way to complete this task quickly and efficiently without the hassle of coding it yourself? When you integrate Accusoft’s FormSuite for Structured Forms software development kit (SDK) into your application, you’re providing a quicker way for lenders to obtain data. FormSuite automatically identifies the type of form based on examples in its master library.
How does it work? This SDK uses specific character recognition algorithms like optical character recognition (OCR) and intelligent character recognition (ICR) that enable FormSuite to capture the data from a scanned paper document.
No matter the size of the file, this integration can help your end-user quickly categorize forms, identify form fields, and search for unique information.
Rounding Out the Process
Once the integration pulls all of the data from these standard forms together, you’ll need a way to transfer the data into a specific database. Simply code a connection, and you’re set to go. Your consumers will thank you later.
When your clients have the ability to process data faster, they win more business. Help your customers succeed, and remain their trusted partner for digital financial technology. Learn more about how Accusoft’s solutions can enhance your application’s credibility today. Contact us for a demo.

Goal
Create a command line program in C# that can read a CAD file (DWG, DXF, or DGN format), then use ImageGear .NET v24 to convert this file to a PDF file with either 2D image conversion or 3D images from the original CAD file.
Requirements
- C# development environment (Visual Studio used in this example)
- Accusoft ImageGear .NET v24 SDK
Computer-Aided Design To Portable Document Format
One of my favorite school projects was Build Your Own House. We were given an imaginary mortgage value, graph paper, and the task of building our dream house based on that budget. I agonized over where to place doors, and how to make sure there was enough room for them to open into my private office where I’d have a collection of Transformer and Teenage Ninja Turtles. Using a ruler, I marked off the dimensions of every room, how my kitchen would be, and because I was 10 years old at the time and knew I’d never marry a girl because girls are “yucky” at that age, I’d have just one big room with enough space for a Pac-Man machine in the corner.
Sadly, I never got my own Pac-Man machine. But the principles behind Computer-Aided Design (CAD) files and my old graphs of my house are the same – a way to represent on computer what my ruler and graph paper tried to. With CAD, you can represent everything from machinery to the skyscrapers. Every detail, from the smallest object to the largest structure, can be represented.
Odds are, though, not everyone has access to a CAD viewer. You want to show off that great new condo design to a prospective buyer, or automate the process of updating documentation based on the most current CAD designs. The best option would be to take your CAD files and convert them to PDF format, but without all the tedium of sitting at the computer to open and convert the files by hand.
This demonstration will show how to perform that same task using Accusoft ImageGear v24, which has built-in support for a variety of image files, PDF documents, and CAD file conversion. The sample code will be using C# as our base, but with the ImageGear .NET SDK any supported .NET language will work for you.
The sample code is below, and a code walkthrough will follow.
Prepping the Development Environment
Before we get started, we’ll need to perform a few tasks.
Install Visual Studio
This demonstration uses Visual Studio 2017 Community Edition, but ImageGear .NET will support previous versions.
Install ImageGear .Net SDK
An evaluation copy can be found here. As of this writing, the most current version is .NET v24, which adds support for CAD files as well as a plethora of other file formats.
The ImageGear .NET SDK installs by default under “C:UsersPublicDocumentsAccusoftImageGear.NET v24”. We’ll call this the INSTALL_DIRECTORY through the document. We’ll be referring to this directory for some files we’ll need in a moment.
Create Your Project
This demonstration shows how to construct a command line version. Fire up Visual Studio, create a New Project, and select C#, then “Console App.” Give your project a name – we’re going with “AutoCAD2PDF” here:
Once our project is created, we need some files from our ImageGear .NET SDK. Go into your ImageGear .NET SDK install directory and navigate to “INSTALL_DIRECTORYBinx64” (or “INSTALL_DIRECTORYBinx86 if you’re still working in the 32-bit world). Copy all of these files into your Visual Studio project into the Debug directory, so if you named your project AutoCAD2PDF, you’ll want to put these Accusoft resources files into “AutoCADto2DPDFAutoCADto2DPDFbinDebug”.
One other thing that will help us keep things organized. In the Debug directory, create two folders:
- Input: Place the CAD files to be converted in here.
- Output: The program will place the converted files into this directory.
Getting the Code Ready
We need to add in our ImageGear libraries into our project. We’re going to put in the minimum ones to make our program work. In Visual Studio, go to the menu and select Project, then “Add Reference”. Select Browse, then browse to the Debug directory where we copied the resource files and select the following DLL files:
- ImageGear24.Formats.Common.dll
- ImageGear24.Formats.Vector.dll
- ImageGear24.Core.dll
- ImageGear24.Evaluation.dll
Now it’s time to code.
Architecture of a Conversion
Converting CAD files to PDF using ImageGear requires we know a few things:
- What is the CAD file to read from (supported file formats are DWG, DXF, and DGN)?
- What will be the name of the file to write to (this program will verify that the file extension is .pdf)?
- What version of PDF are we writing to (this program supports version 1.3 up to 1.7, with 1.7 being the default)?
- Do we want to export the images as 2D or as 3D objects in our PDF file?
Optional: This step just helps keep track of your code. In the Solution Window, right click on “Program.cs” and rename it to “CAD2PDF.cs”. This is just if you want to keep your various classes organized, so if you add this code to other projects you don’t have a class with a boring name like “Program.”
What’s in a NameSpace?
Let’s set up our name spaces to add support for our various C# objects. Add the following name spaces into the start of our CAD2PDF.cs file:
We’ll focus on our main class first, where we get our parameters. Our main class is looking for four parameters we defined above: the CAD file to read, the PDF file to write to, what version of PDF (listed as “PDFv1_3”, “PDFv1_4”, and so on to “PDFv1_7”), and whether we want a “2D” or “3D”. So a typical program call will look like this:
Here’s how we set up our main function to track this. If we don’t get these four arguments, the program will exit:
Before we go any further, we’ll want to validate and make sure that everything will run right. Our function ValidateParameters will make sure that our input file exists, that we can write to our output files, and that both files are the proper format as far as file extensions for CAD and PDF:
Next, we want to set up the save options for our CAD to PDF conversion. All of these are stored in our function BuildPDFOptions, which takes our PDF version settings, whether it’s going to be in 2D or 3D, and then puts them together in the ImageGear CADPDFSaveOptions object. It sets up the metadata for our PDF file, the dots per inch settings, and the background color. In this case, we’re setting up the page background to be white. If you need more information on the various CADPDFSaveOptions settings, check out the ImageGear .NET documentation
If everything checks out, we’ll use the real workhorse function, ExportCADtoPDF. This is the meat of the ImageGear experience. We’ll take in our CADPDFSaveOptions, the inputFile and outputFile and run the conversion process:
Once the evaluation settings are complete, the conversion code very quick, so don’t blink or you might miss something. First, we read the CAD file into a ImageGear ImGearCADPage object:
Well, that was simple enough. Now we just use our CADPDFSaveOptions settings, and write to our target file:
“That’s it?,” you may ask. That’s it. There are other options you can pursue using Accusoft, such as which pages to export. But let’s use an example. Here’s a CAD rendering of a gripper arm-cute little thing:
You can get your own copy from AutoDesk here.
So how does it look when we run it through our program and bring it to a 2D PDF?
And here’s the PDF rendering with a white background:
Let’s have some fun. Go back into the BuildPDFOptions function and let’s change the background from white:
To black:
And how does our converted PDF file look now?
The movie TRON would be so proud of this look.
Give the source code a try and play with it, and see if ImageGear meets your image editing and converting needs. Want to know more? Read the official documentation, try out the code samples, or feel free to contact us and see how we can meet your needs.
So you’ve tried out our SDKs and you’re ready to install the license. The problem? You’re not sure how to get started. Accusoft offers a number of different license types based on customer need and environment. The following will show you how to install licenses for both evaluation and deployment depending on your specific needs.
The Basics on Activating Your Development License
The development machine licensing allows you to develop your applications without receiving evaluation prompts during runtime. To activate your license on your development machine, you will need to use the License Manager. Activating your license is simple. Just log into the License Manager using your account information and then click Activate.

Also, make sure to comment out any licensing calls in your code so that the toolkit will not look for a deployment license on the machine. When you’re ready to deploy your application, you have three different options for deployment: Node-Locked, OEM, and Web‑OEM. Our sales team can work with you on finding the right licensing for your project. Ready to get started?
Evaluation Licensing
During evaluation of Accusoft products, Evaluation licenses can be used to try out products. This license permits an Accusoft product or toolkit to be used on a system, whether it is a development machine or any other type of system. This type of license is best noted by an Evaluation dialog displaying occasionally while the product is in use.
Once the Evaluation dialog is dismissed, the product will continue to operate. Other forms of Evaluation or trial behavior include the watermarking of images when displayed or saved. When an Accusoft product is first installed onto a system, if no other license currently exists on the machine (and no other license is provided by the user during the installation), an Evaluation license will be placed on the system by default.
Interested in a more permanent licensing solution? Here are some instructions for installation for various scenarios.
Development SDK Licensing
As a precursor, Accusoft software is limited for use on a single CPU. Any runtimes or copies installed or distributed must be granted by a direct license from Accusoft. The first thing you’ll want to do is check your customer portal to make sure that you have an SDK license available.

Next, make sure there are no active license calls in your code (comment out any calls using a solution name, solution key, and OEM license key). When the license calls are active, the toolkit will be expecting a deployment license to be on the machine – which will fail since only a development license is on the system. When the licensing calls are not being used, the toolkit will automatically look for a development license.

You’ll want to make sure that there are no calls to SetSolutionName, SetSolutionKey, or SetOEMLicenseKey in your code. This ensures that no keys are pulled from your deployment pool.
Next, we’ll open the License Manager and log in.

Select a toolkit under the “Purchased Toolkit” section in the License Manager and click Activate on the right side of the dialog.

Once this is done, you can run your project and you won’t receive any licensing prompts. Your development machine is now licensed.
Deployment Runtime Licensing Overview
Node-locked licensing is designed for when your applications will run on a relatively small number of machines. Each of the machines will be assigned a license that is tied to the system’s hardware.
Once the license is applied, it cannot be removed. If a machine is being removed from service, please contact our sales department, who can assist with obtaining new licenses. You can license deployment machines programmatically (by using the LDK component) or by using the Server License Utility (SLU) provided with the SDK. In your code, you will call SetSolutionName and SetSolutionKey.

An OEM key unlocks the toolkit for use on many machines. With this key, there is no need to run the license utility and the license is not tied to any hardware. You can just throw it in your code and you can deploy without worrying about licensing individual machines.

The Web‑OEM key is used when embedding our ActiveX controls on your web page and is used to license client machines in the web application. The license is applied similarly to regular OEM with a SetSolutionName, SetSolutionKey, and SetOEMLicense key. When you purchase this license model, your OEM key will be web‑enabled.
Node-Locked Licensing
There are two methods you can use to register a runtime node‑locked license. SLU, the Server License Utility, and LDK, the License Deployment Kit. Both of these methods perform the same function of registering the runtime node‑locked license. The only difference is that the SLU provides a user interface for the LDK.
If you wish to hide the license registration from your end user, you will likely want to use the License Deployment Kit, which allows you to integrate the registration process in your application. Please note that when installing the license, the user that you’re running as must have administrative rights in order to add the key to the registry.
You will need a license configuration file for the SLU or LDK to activate licenses. The license configuration file contains information about runtime licenses for a particular platform, a version of a toolkit, and it can be downloaded from your Accusoft customer portal. Next, you will need to register your SLU if you’re planning to use the Server License Utility. The instructions are in the ReadMe file.

You’ll want to run the command prompt in administrative mode. Navigate to the location containing the Accusoft license client DLL. Once the DLL is registered, we can run the SLU. Here, we’re adding the config file that was downloaded. It gives us the option to auto‑register. This is available when you have an online connection, or manual register. When the computer is offline, you can do a manual registration. Here, we’re going to do the auto‑registration.
If licensing fails to register, you will receive an error message and a 14‑day temporary license will be applied, allowing you time to get the licensing issue resolved. If the license succeeds, your application should run without issues. As mentioned earlier, if your computer is offline, meaning that it has no Internet access, you can register using the manual registration process.

In this case, you will want to copy the hardware key and URL to a removable media device such as a thumb drive, and then, take it to a system that is connected to the Internet. From the connected system, paste the URL into the browser. A page will appear that contains a field into which you will enter the hardware key. After this hardware key is entered, a license file with a license key is downloaded, which you then save to the removable media, and take it to your offline system. Place your key in the SLU and click the license button to register your offline machine.
Once you’ve completed either process, your machine is licensed.
OEM Licensing
OEM licensing is ideal when deploying to many workstations or servers that have no Internet access. It provides an easier means of licensing for when your application runs in a secure environment. Accusoft’s OEM licensing is not tied to a specific computer and offers a quick and easy way to get your application licensed and ready for deployment.

First, if you haven’t already, you will want to obtain your license information from your customer portal. To apply an OEM license, simply add the solution name, solution key, and OEM key to your solution. It’s important that this information is placed before the usage of the toolkit within your project. Otherwise, when the application runs, you will see the licensing prompt. Now, we’ll run the application, and you see that the prompts to install the license are now gone.
Web OEM Licensing
If you’re using our ActiveX toolkits and you would like to embed them in your web page for running in a browser, you will need to use a special OEM license that’s intended for this type of deployment. To obtain a Web OEM license, please contact our sales department. They will provide you with access to a special site for generating Web OEM keys.
Once you access this site, you will enter the domain of your website where your web page will be hosted as well as the associated license information provided by our sales department. This will generate an OEM key, which you will be able to use on your web page.
In your web page’s scripting code, you will need to call the SetSolutionName, SetSolutionKey, and SetOEMLicenseKey functions, respectively, providing the license information for that toolkit. With this information in place, you can host your web page, and the ActiveX control will be licensed.

If this fails, however, then you might see a license error dialog display. Make sure that you’re using an actual license that was generated from the Web OEM license generator website provided by our sales department per your purchase.
If you need specific directions for licensing a particular SDK, please view the product on the Accusoft website and select documentation under the reference drop-down menu. For all of your other licensing questions, please contact a sales representative at info@accusoft.com or call us +1-800-875-7009 nationwide or +1-813-875-7575 international.